Discussing the finished appearance
Photographing an uneven render finish in raking light
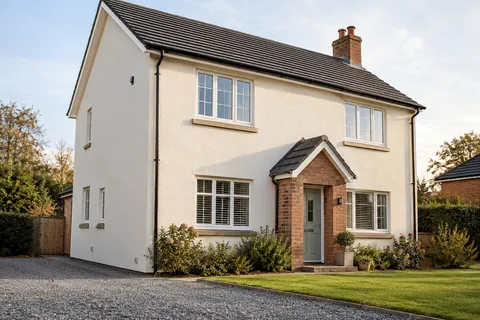
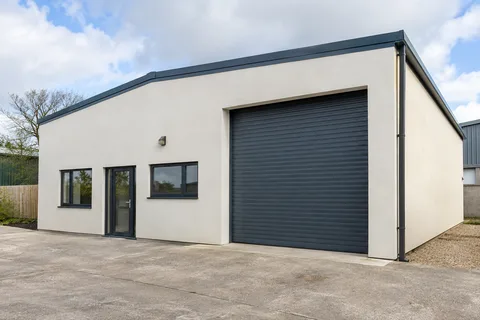
Low sunlight travelling across a wall can reveal ridges, hollows and texture that seem much less obvious at midday. A photograph taken in that light may explain a concern well, but it can also be difficult to interpret without context. If you are discussing the appearance of a Macclesfield rendering project, the aim is a fair record of what you can see. A short sequence of photographs is usually more useful than one dramatic close-up.

On this page
Understand what the light is showing
Light arriving at a shallow angle casts shadows from small changes in the surface. That makes it useful for observing relief, but it does not establish why the surface has that shape. The cause might relate to the background, preparation, finishing or the intended texture. Within a Macclesfield rendering brief, a photograph cannot reliably separate those possibilities without information about the wall and the specified system.
Different finishes respond differently. A scraped monocouche surface has its own grain, while a silicone finish may have a finer or differently distributed texture. Comparing either with a digitally smooth visualisation can create an unrealistic reference. The relevant comparison is the agreed product, sample and finish specification, considered at an appropriate scale and under meaningful viewing conditions.
Begin with the whole elevation
Take a view that shows where the concern sits on the building. Include recognisable features such as windows, corners or a downpipe so the image can be located later. This helps distinguish a small isolated area from a broad pattern and gives anyone reviewing the photograph a sense of proportion. A close image of a ridge without location can be difficult to act on.
Photograph from a safe position
Photograph from a safe, accessible position. There is no need to climb onto a roof, use an improvised platform or lean from a window to make the evidence more convincing. If the relevant area cannot be inspected safely from the ground, suitable access and competent inspection may be needed. The homeowner's photographs can still identify the position and explain why a closer assessment is requested.
| View | What it contributes |
|---|---|
| Whole elevation | Locates the concern and shows the broader appearance |
| Normal viewing position | Represents how the wall is usually seen |
| Closer view | Shows texture and the particular feature |
| Raking-light view | Highlights surface relief, with time and direction noted |
| Different daylight | Helps distinguish persistent features from lighting effects |
Add a normal view and a detail view
A photograph from the position where the wall is usually seen provides useful context. That might be the front path, garden or an ordinary window view. Then add a closer image that shows the feature itself, without losing all reference to its surroundings. The two views answer different questions: how noticeable the issue is in use, and what its surface appearance looks like.
Keep dates and approximate times where possible. Note which direction the light was coming from and whether the wall was wet or dry. These details help explain why two photographs of the same area look different. They are especially useful if the discussion takes place several days later under different weather, when the original effect may not be visible in the same way.
Give each area a simple reference, such as the wall above the kitchen window, and use it consistently in correspondence. If several concerns are being discussed, separate their image groups. That avoids an agreed response to one patch being mistaken for acceptance of a different area elsewhere on the building.
Preserve the original images
Phone cameras automatically process images, so even an untouched photograph is not a calibrated measurement of a surface. Nevertheless, preserving the original is better than repeatedly adjusting contrast until the feature appears strongest. If you crop or annotate a copy, keep the wider image alongside it. A simple arrow and a location label can be helpful without altering the wall's apparent colour or relief.
Avoid using a zoomed screen image as a substitute for viewing the actual finish. Enlarging a small area can exaggerate its importance or introduce compression artefacts. Conversely, a distant image can conceal a genuine concern. The strongest record includes both scales and makes clear what each is intended to show. It gives the reviewer enough information to decide whether an on-site assessment is needed.


Compare against the agreed finish reference
If a sample panel was approved, photograph it under reasonably comparable conditions and retain its product details. The sample may establish colour and texture without demonstrating every aspect of a large wall's flatness. That limitation should be recognised. A loose chip is an even narrower reference: it can identify a colour range, but not the workmanship of an entire prepared elevation.
Check the contract or specification for the finish that was actually agreed. If the brief was simply smooth or tidy, there may be uncertainty to resolve because those words mean different things to different people. This is a reason to clarify the standard, not to invent a numerical tolerance after completion. Any technical assessment should use the applicable specification and relevant professional judgement.
Describe the concern without deciding its cause
A useful description might say that a visible band runs beneath two windows and is most noticeable in late-afternoon light. That is more precise than declaring that the whole render system has failed from a photograph. It also leaves room for the person inspecting the work to explain whether the feature concerns surface appearance, the background or something else.
If cracking, detachment or staining is present as well, identify it separately. Those symptoms may require a render repair assessment rather than a discussion about visual uniformity alone. Do not let a debate about lighting obscure a physical defect, and do not assume that every visible undulation indicates structural movement. Separating the observations makes the next step more proportionate.
Review proposed remedies at a realistic scale
Once the cause and significance are understood, a proposed remedy should explain what will change and what may remain visible. Local filling, broader levelling, replacement and decorative coating are not equivalent treatments. A new colour may change how a wall reads, but it should not be offered as a technical correction for an unresolved underlying defect.
Where a trial remedy is sensible, agree its location and review conditions before extending it. A small wet patch should not be judged as though it were the completed, dried elevation. Nor should a successful isolated trial automatically prove that a different area with another background will respond identically. The remedy needs to follow the actual condition and the selected product instructions.
Use the record to reach a clear next step
The photograph set should support a practical decision: a joint inspection, clarification of the finish standard, a limited trial or an appropriate specialist review. Keep the response with the original images and the relevant specification. This helps everyone refer to the same issue rather than accumulating disconnected photographs and messages that describe slightly different concerns.
For a future wall rendering project, agree the sample and assessment approach before work begins. Discuss prominent surfaces that receive low-angle light and the condition of the background beneath them. That does not remove every possible disagreement, but it gives the finished appearance a shared reference. Photography then becomes a useful way of explaining observations, rather than a contest to find the most flattering or least flattering angle.
Common questions
Does a raking-light photograph prove defective workmanship?
Not by itself. It can show a feature clearly, but a judgement needs the specification, agreed finish reference, wall context and appropriate assessment. The photograph is evidence of appearance under those conditions. It should not be presented as a complete technical diagnosis or dismissed simply because the light is revealing.
Should photographs be edited to show the problem more clearly?
Keep unedited originals. Cropping a copy or marking the area can help explain its location, but retain the wider view and avoid filters or contrast changes that alter the appearance. If an annotated version is used, identify it as such so everyone can compare it with the original image.
See housing and planning information for Macclesfield and nearby places, including the source and geography behind each figure.