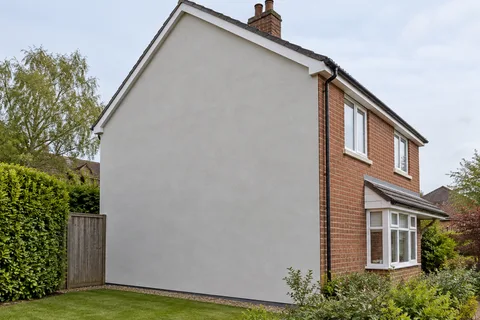
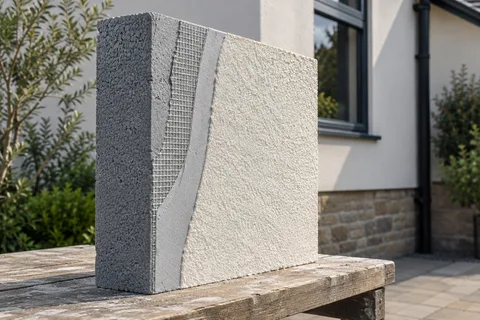
The bottom edge of the wall
Changing ground levels: draw the render base in section
The bottom of a wall can look like a simple straight line on an elevation drawing. Beside a sloping path, stepped patio or raised flowerbed, it may be anything but simple. A rendering specification needs to account for the actual ground relationship along the wall, particularly if insulation will move the face outwards. This guide explains how a section drawing can make those decisions understandable before a Macclesfield wall project begins.

On this page
Why the broad elevation is not enough
When planning rendering in Macclesfield, an elevation shows the wall face from the side, but it can hide the depth and level of what sits against it. A patio may fall away at one end and rise close to the finish at the other. A planter may cover part of the wall below the visible surface. If those conditions are not shown, a neat horizontal render line can give a misleading impression that the same detail works everywhere.
The problem is not solved by choosing an arbitrary height and applying it around the house. The wall construction, any damp-proof course, drainage and the specified system all influence the appropriate arrangement. These need to be established for the building. A generic diagram on a product page can explain a principle but should not be copied as a measured design for a different property.
Mark the places where the relationship changes
Walk the accessible ground-level perimeter and identify changes in paving, steps, beds and adjoining roofs or structures. This is an observation exercise from a safe position, not an invitation to excavate or disturb the base. Photographs can be labelled with their location so the designer or contractor can connect them to the elevation. Where a level or construction is concealed, note the uncertainty for proper investigation.
Several short sections may explain the job better than one elaborate drawing. A section beside the front path, another at a raised patio and a third at a lower side passage can show distinct conditions. The purpose is to avoid treating the entire perimeter as identical simply because the wall above it will share a colour. Our wall rendering guide places these perimeter details within the overall scope.
Label the section positions on the elevation so the site team can identify them without guessing.
Landscaping and rendering are often planned close together. A drawing should therefore label which ground line exists now and which is intended when the project is complete. If the renderer prices against today's path but the landscaper later raises the paving, the finished relationship may differ from the one that was assessed. Agreeing the final level early reduces that risk.
The same applies where old paving will be removed or drainage altered. Do not rely on a verbal understanding that another trade will lower or adjust something later. Show the relevant work and identify who is responsible. If the final ground design is not settled, the render base should not be treated as an independent decision that can safely be completed first without coordination.


Put the wall construction on the section
The drawing needs to show more than a coloured strip representing render. Identify the existing wall and the layers proposed outside it. Where the position of a damp-proof course is relevant, it should be established rather than guessed from a brick line in a photograph. Traditional construction may present a different situation from a newer cavity wall, so the designer's understanding of the building matters.
Show the system termination and the relationship to adjacent surfaces. The named product guidance should inform the detail, alongside the building's drainage and moisture considerations. A render coat should not be expected to solve a ground or drainage problem simply by covering the visible wall. If an existing base area is deteriorating, the repair assessment needs to consider the cause before the same arrangement is recreated.
Insulation makes the section particularly important
External wall insulation introduces additional thickness and a system-specific base arrangement. That can change the relationship with paving edges, steps and projecting features. The detail must also connect sensibly with insulation elsewhere on the building. A render-only section cannot be assumed to remain valid after boards and their associated components are added.
Compare the insulated and uninsulated arrangements on the same measured background. This makes it easier to see which changes arise from insulation and which repairs were already needed. It also helps separate the work packages: ground alterations, drainage and system installation may involve different responsibilities. The final decorative colour does not reveal any of these distinctions once the job is complete.
Water can reach the lower wall from several directions, including rainfall, splashback and defective rainwater fittings. A stain near ground level does not prove one cause. The surrounding drainage and the condition of gutters and downpipes should be considered as part of the assessment. SPAB's rainwater guidance explains the consequences of concentrated wetting, but diagnosis still depends on the particular building.
The design should preserve a sensible route for water to leave the building and avoid creating a new trap against the finish. This requires coordination with whoever designs or installs the adjoining ground work. A rendering contractor should not be left to invent a drainage solution because the new paving meets the wall differently from the original quotation. Where the issue extends beyond the finish, the appropriate expertise should be involved.
Mark existing and proposed ground levels at the relevant positions.
Identify the wall construction and any known damp-proof course.
Draw the proposed render or insulation build-up and termination.
Coordinate drainage and adjoining paving with the responsible designer.
Keep the approved detail available before the base is covered.
Make the inspection point easy to recognise
Important parts of a base detail can become concealed as work progresses. Agree when the relevant levels and components should be checked, and by whom, before they are covered. A photograph taken at that stage is useful if it includes enough context to identify the location. Pair it with the approved drawing rather than relying on an isolated close-up that nobody can place later.
If the site condition differs from the drawing, resolve the discrepancy before continuing. The answer may be a revised detail, further investigation or a change to adjoining work. What matters is that the change is intentional and documented. Simply following the original sketch despite a different ground level does not preserve the design; it produces a different arrangement with the appearance of compliance.
Keep the base within the whole-house plan
For house rendering, include base sections in the same schedule as roof edges, openings and other junctions. They deserve comparable attention even though they are less prominent in the finished photographs. A well-considered bottom edge helps the exterior function as a complete assembly, rather than a broad decorative face with unresolved conditions just below it.
At handover, keep the final drawings and any relevant changes with the product information. Future landscaping or paving work should be able to understand the relationship that was designed. That record is especially useful if a new owner later considers raising a terrace or adding a planter. The benefit is practical: subsequent work can be planned from a known detail instead of rediscovering it after the wall has been disturbed.
Common questions
Can the base detail be selected from a photograph?
A photograph can reveal a change in level or an obvious relationship, but it may not identify the wall construction, hidden layers or damp-proof course. Measurements and suitable inspection are needed before a reliable detail is specified. The photograph is a useful aid to the discussion, not a substitute for those checks.
Should new paving be finished before rendering?
There is no universal sequence. The trades need an agreed final level and interface before either closes off the detail. Protection, access and drainage also affect the programme. The important point is that both quotations use the same intended levels rather than each contractor assuming the other will adapt later.
See housing and planning information for Macclesfield and nearby places, including the source and geography behind each figure.